Simple DIY Cable Continuity Tester
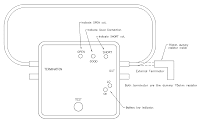
How to use
This simple cable tester can be used to check 2 wire cable such as coax cable, telephone cable, audio cable and etc.
Power the circuit using 9V battery.
Plug in the cable and push "TEST" button.
The dummy resistor is connected to the end of the cable which has 75ohm resistor inside.
The tester will show only 3 conditions, "SHORT", "OPEN" and "GOOD".
How it works
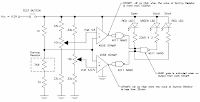
The method is to check resistance of the dummy resistor at the "Terminator".
The idea is simple.
Imagine there is a short circuit cable under testing.
The wire will act as nearly zero ohm resistor thus making the voltage divider near the dummy resistor to divide the 9V into 4.5V.
Calculate it your self [ ( 1k / ( 1k + 1k ) ) * 9V = 4.5V ].
4.5V is below than the lower "Comparator" limit (Vref 4.57V).
It will trigger the lower "Comparator" and make "Short" LED to light up.
Now for the open circuit cable.
Assuming the open circuit cable has an infinite ohm.
Voltage divider near the dummy resistor will give 9V.
This is more than the upper "Comparator" limit (VRef 4.8V) and will trigger make "Open" LED light up.
Other than that (both lower and upper "Comparator" didn't trigger) the "GOOD" LED will light up.
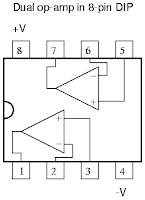
For the op-amp, I'm using JRC4558 dual op-amp since I have it in my stock.
You may use 741 op-amp or other multi-purpose op-amp.
Learn more about op-amp here
Vref tuning
Before turning on the circuit (power it up),
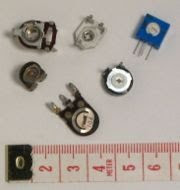
tune the potentiometer so that it will give the correct voltage reference to the "Comparator"s.
- Upper "Comparator" = 4.8V
- Lower "Comparator" = 4.57V

0 comments:
Post a Comment